Wednesday, January 31, 2018

Modern Red Rectangles - A Finished Believe Circle Quilt


In December, it was my turn to choose our design, and I chose simple blocks in red and neutral.


They don't look like much individually, but put them all together and they form a stunning modern design.


I love how, with some general guidelines, a group of blocks made by ten different quilters can result in such a lovely finished quilt. And I also love that these projects help use up fabric stash that may have been around for quite a while.


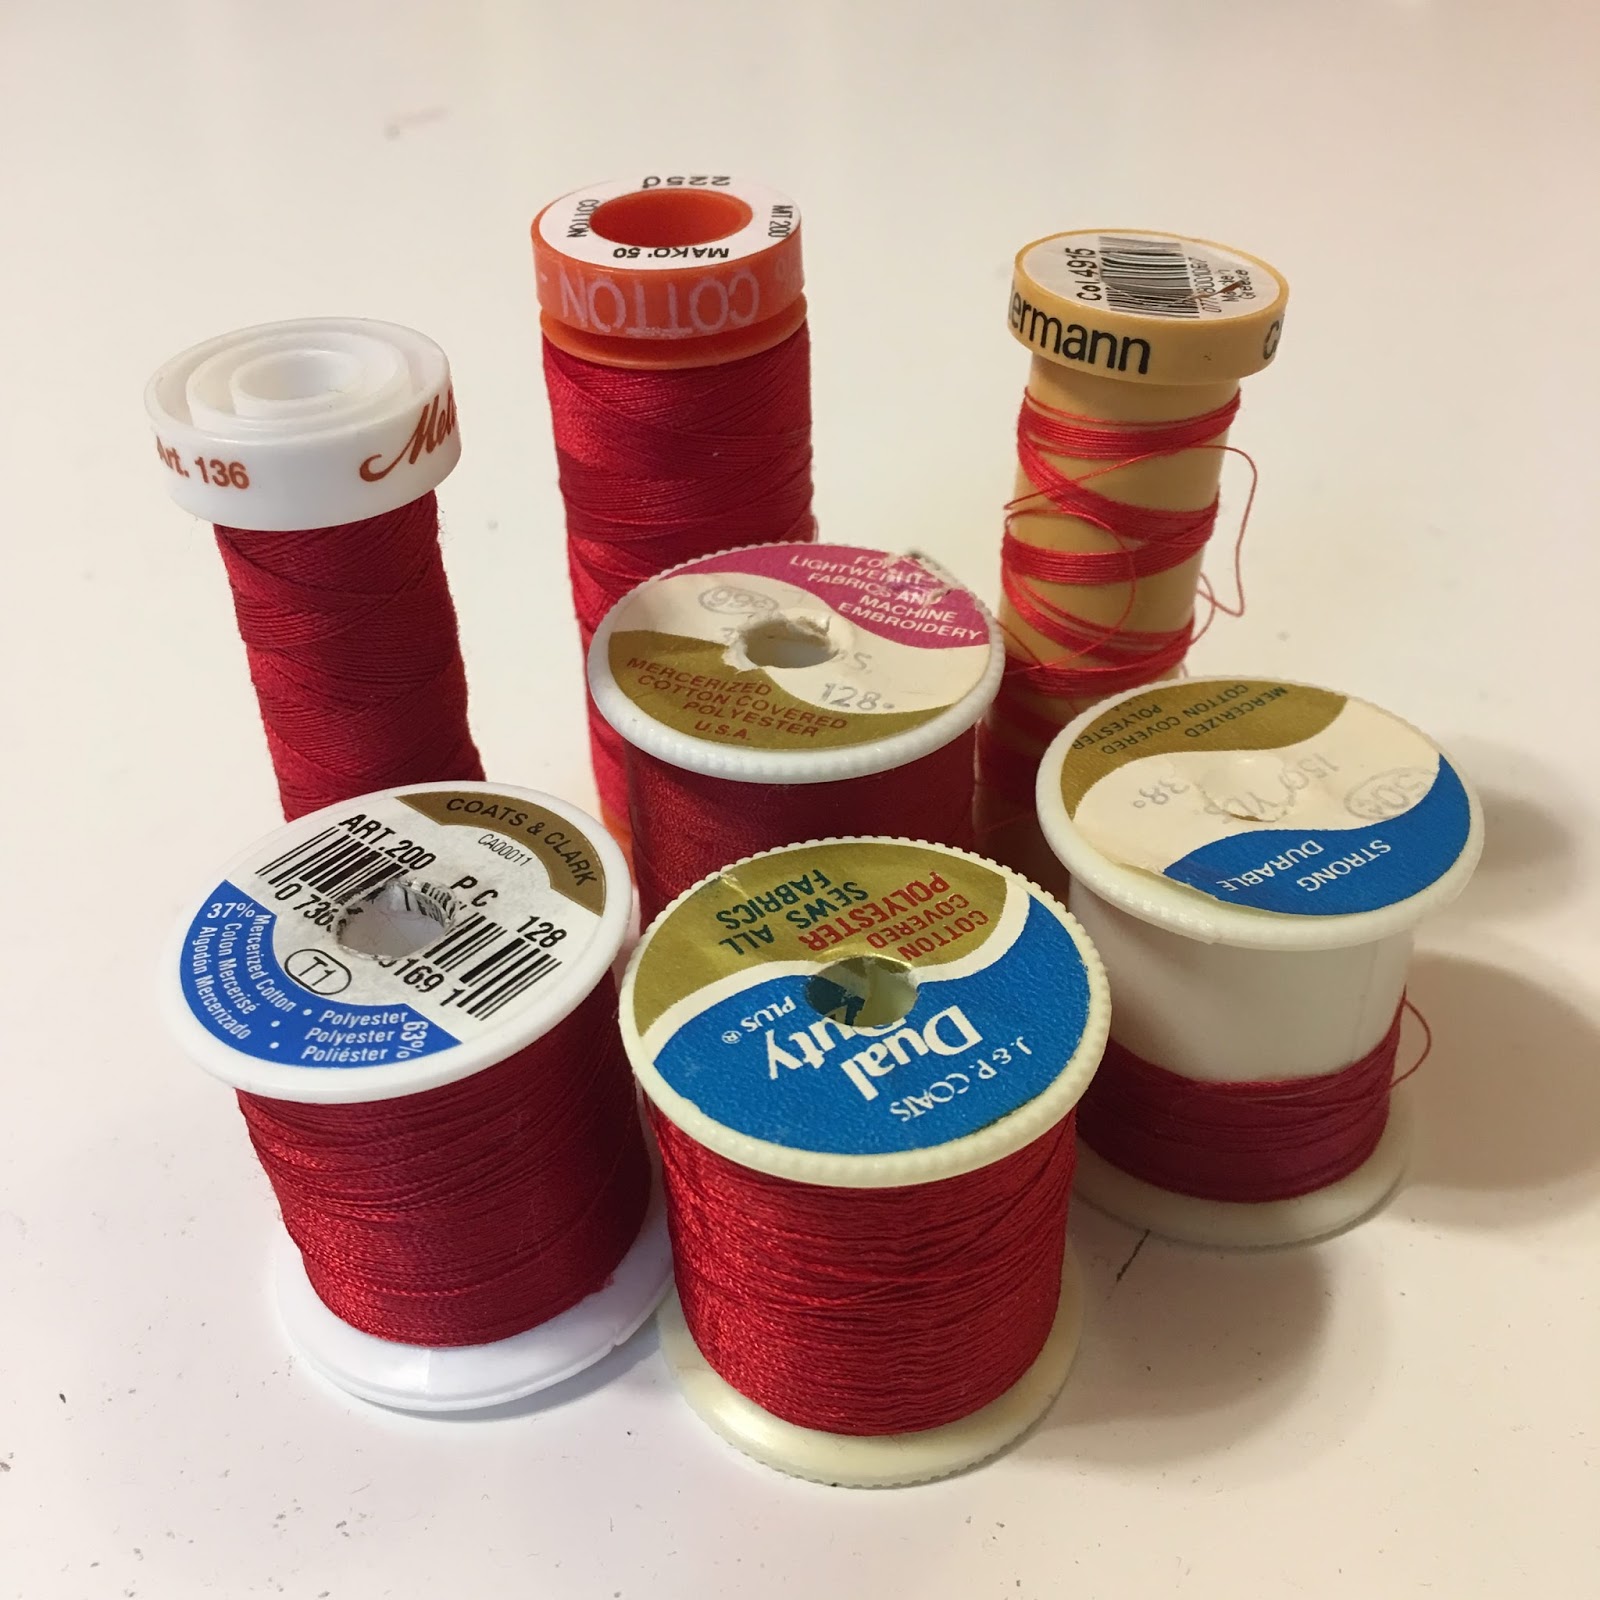
Sometimes it is more than fabric stash that gets used. Thread stash needs help from time to time as well. As you can see, I have tried a wide variety of thread over the years. I'm a fairly die hard Aurifil fan these days and I was ready to see some of these older threads go, especially the ones with such a tiny amount left on the spool.


Normally, I lean toward neutral colors for quilting but for this project, it was going to be all red all the way. What a great way to use up some of that lingering thread stash. The wavy horizontal quilting lines have become one of my favorites for adding texture without overwhelming the quilt.


It's always a tension risk to mix up weights and brands of thread and I thought I was being careful each time I changed thread, but apparently I was not being careful enough. Fortunately, this only happened for a few rows, so the unsewing was not too overwhelming.


Look how much thread was used! Now there is more room for trusty Aurifil.


This is why I don't like using most other thread brands. The lint and build up is so heavy. This is not good for your sewing machine. A good cleaning is in order before the next project begins.


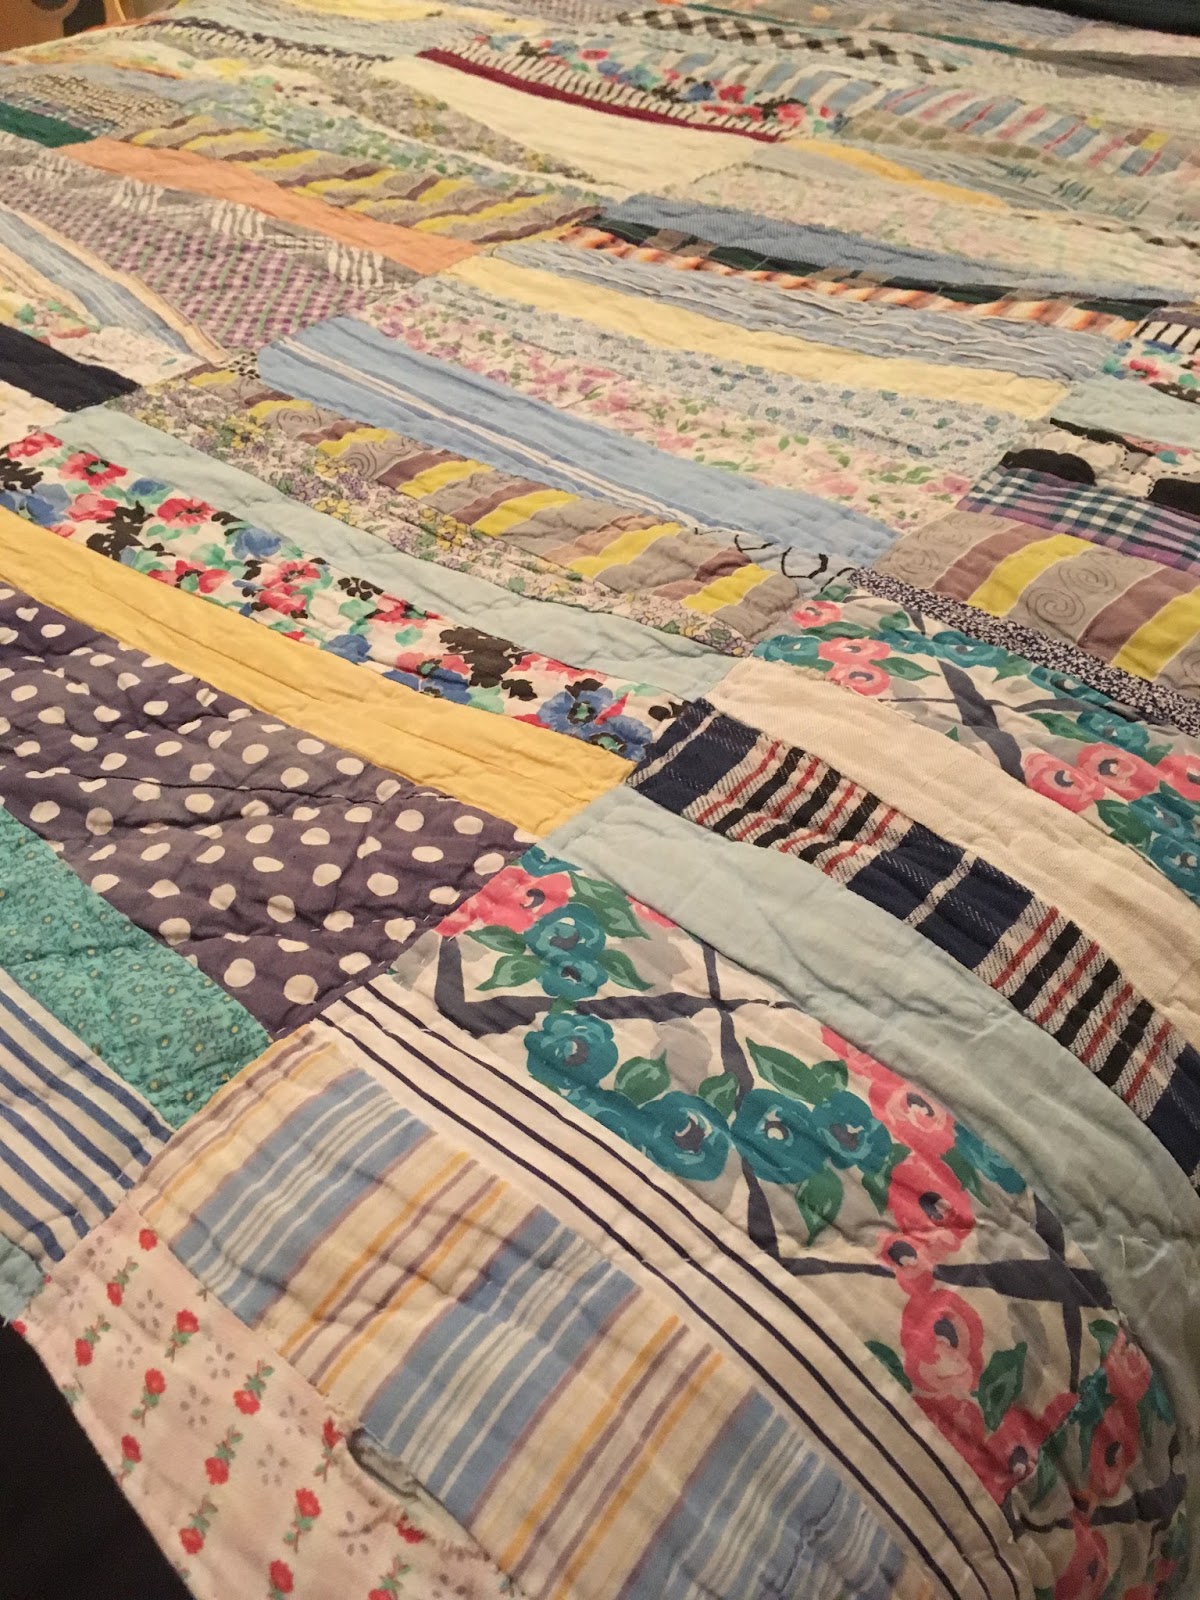
The quilt back includes two extra blocks from the twenty blocks made by our circle.


There was enough extra from one of the backing fabrics to use for binding.


Now to throw this quilt in the wash with three or four color catchers. Hopefully, they will keep those reds right where they belong. The Believe Circle of do. Good. Stitches sends most of our quilts to My Very Own Blanket, an organization that gives quilts to foster children so that they will have something that belongs just to them and can stay with them no matter where they go. That is where this quilt will be shipped later this week.

Friday, January 26, 2018

Scrappy Pineapple Quilt Finish


This quilt originally started out as a gift for my mom. She wanted a quilt. I wanted to make a pineapple block. Perfect match, right? Well, no. This crazy, bright, bold quilt is very much my style but not so much hers. I set this aside to make a quilt she would love. You can read about that one here. I knew when I got back to working on this one, it would be for me.


I had never made a pineapple block before and I used the tutorial from Crazy Mom Quilts. It was a little slow going at first as so many new things are, but once I got rolling, I knew this would be a scrap buster extraordinaire.


The digging through scraps round by round was not a lot of fun, so I hunkered down and cut them all. All 1,140 of them. Yep. There are 1,140 pieces of fabric in this quilt top. I probably should not think about that too much.


The more blocks I made, the more bold and crazy the blocks became. I considered redoing this one because it is a bit over the top, but in the big scheme of the quilt, it fits in just fine.


And once I knew this quilt was for me and not for mom, the nerdy fabric came out.


This quilt finishes at 60 x 75 inches. It is quilted in big, loose, elongated loops using Aurifil 50 wt thread. Light gray (2900) on the top and a khaki tan (2600) on the back.


I did not want the quilting to be too heavy, and it is extra fluffy and crinkly after washing.


The binding is teal pearl bracelet fabric. I could not decide on a color for the binding and at breakfast one morning my husband said, "Teal. Make a teal binding." And so I did. The newsprint fabric on the back matches the backing fabric of the quilt I made for my mom. I like that the two quilts are connected in that way.


This is going to be my cozy sofa quilt for a while. I may take it to my office to hang on the wall after the weather warms up. There are lots of stories in those fabric scraps and it would be fun to be able to see it from my desk throughout the day.


I don't have full stats on this project since I only started tracking that at the beginning of the year. Here is what I know:

Size: 60 x 75 inches
Purchases for this quilt: Backing fabric and thread
The quilt top is entirely stash, the batting was on hand, and the binding was gifted in a give away from Pink Door Fabrics.
Time spent quilting: 3 1/2 hours (that big loose pattern went really fast!)
Binding: 1 1/2 hours

Thursday, January 18, 2018

Orphan Block Pot Holders


It was time to make some new pot holders and my favorite way to make them is by using orphan blocks.

This is just two of the old ones. They had stains that would not come out and burn spots. I wrote about making these in November 2015. Two years is a long life for something that is used every single day, although I probably pushed a little too long with these.


This is my younger boys bedroom back in January 2011. We had just converted their bunk beds into twin beds and these were new quilts for their beds. One of my very early blog entries shares their room transformation.


This long panel was part of the planning that went into those quilts. It was perfect to cut into squares for new pot holders.


Each pot holder has six layers. The heat resistant fabric is Therma-Flec and two layers of batting make each pot holder more sturdy. Since there were so many layers, each binding strip is cut 2 1/2 inches wide (normally I like 2 1/4 inch binding strips). Each pot holder finishes at a little over 8 inches.


The stacks are layered and ready to go so that I can sit and sew them up without stopping between each one. 


The machine quilting is simple with straight lines along each seam line.


The old ones have been disposed of and these fresh new pot holders are ready to go to work. I love finding purpose for orphan blocks.

Monday, January 15, 2018

Purple Baby Heart Quilt - First 2018 Quilt Finish


This sweet quilt was not even on my list of quilty goals for the year, yet here it is. Two of my coworkers are expecting babies this Spring. One of them is having an early baby shower since a super big work deadline is approaching for her team and time for baby showers will become scarce. I don't know her that well so I asked some of her closer work buddies what she might like. Without skipping a beat, I learned that "she really likes purple". That is all I needed to know.


My purple stash is not large so I pulled all of them and sorted them into blue purples and red purples, then I asked my teen design expert which set I should use. He told me to go with the red purples as they were brighter and more fun for babies. Originally, this newsprint fabric was going to be the background but I changed my mind once I decided on a design.


As often happens, there was a quilt on Pinterest I liked. It was all half square triangles and four-patches so it would be easy to scale to a good baby quilt size. Each half square triangle finishes at four inches. There are 114 half square triangles in this quilt so there was lots of squaring up going on.


Once the squaring up job was complete, I played around with the layout for the heart. All those trimmings were loosely tied into two bundles and hung from trees in the backyard. The birds like them for nest building and they will certainly be weathered and soft by the time the birds are ready for them.


Here's the full layout of the quilt. The color placement is random and there was enough variety among the purples that hardly any rearranging was required.


This was so much fun to quilt. I think I say that about every quilt I make and it is so true. There is a cross hatch grid on the heart, straight lines to echo the purple rows, and swirls in all the white space.


I was even brave and used a lilac thread for the swirls. It shows just a little more than a matching thread would show. In fact, I ran out of the lilac thread and had to quilt the top and bottom triangles with cream thread. It is not noticeable in the finished quilt.


This quilt is made entirely from stash. The fabric for the front and back, the batting, the thread, and the binding are all stash. I was very excited about that.


I love the heart. It is a perfect welcome for a new baby.


The pieced backing was a surprise as I originally thought I had enough in one piece of fabric. I wasn't sure I was going to be able to pull it off, but I found the darker purple pieces on a late round of stash hunting.


For the first time this year, I am tracking my time in the sewing room. Sometimes, I think it is best not to know exactly how much time I am spending there or how long it takes to make a specific project, but decided it was worth the experiment for a year. So, here are the stats:

Start date: January 3, 2018
Finish date: January 15, 2018
Finished size: 40 inches x 48 inches
Time invested: 17 hours
Purchases to complete: None. All stash and all supplies were on hand.


The combination of the heart and the purple rows make me think of a heart beat, especially the ones that touch either side of the heart. I'm looking forward to gifting this quilt to a special purple loving mama.


Linking up to Finish It Up Friday at Crazy Mom Quilts.

Thursday, January 11, 2018

Neutral Stack and Slash Quilt Top

For years I have wanted to make a quilt for the master bedroom. It is always more difficult for me to decide on a design and color scheme for a quilt with a very specific purpose than for one I am making for fun (well, they are all fun to make, aren't they?!). The quilt that is on the master bedroom bed in the colder months is one that was made by my grandmother or great grandmother. It could have even been both of them as they lived together for many years of their later adult lives.


It is five fifteen inch wide columns of scraps sewn together in a seemingly random way. Some are fairly straight rectangles, some are quite wonky, and others are pieced.


I love this quilt, but it is not quite big enough for the bed. There are only four inches or so that hang down on either side. I had been thinking about replicating this quilt for a long time, and recently we started talking about painting this room. Since I really want this quilt to be timeless, I decided that the wall needed to be the focus for color and that a quilt for this room should remain neutral. That way it can live on through whatever color schemes come our way.


These pictures are a little on the yellow side as it was early morning and the sun was not all the way up yet. My family has been watching skeptically from the sidelines. One bit of advice from one of the teens... mom, don't put too much pee colored fabric in it, okay? Ha. He does have a good eye, and he was correct in his assessment. There is white, cream, gray, brown, black, taupe, and all sorts of other neutrals. There are a few pieces with other colors but not enough to take away from this truly neutral quilt.


This is the largest quilt top I have ever made and it put quite a dent in the neutral stash, and it is made entirely from stash.The amount hanging over the sides is just perfect. This quilt top is made of six fifteen inch wide strips that are around ninety inches long. The finished quilt as it is will be ninety inches square. The width is perfect.


The length may be a bit too much. I'm going to think about that and may trim it back a little. I've never had a quilt long enough to cover the pillows. I could always fold it back at the top. It would be nice to have extra covers to burrow under on a cold night.


See that rose fabric, the black and white one? That came from my grandmother. It had originally been cut out to become a blouse or jacket. I love that there are fabrics old and new in this quilt top.


I am excited about quilting this one. It will be easy to go quilting crazy so I will have to be careful not to take it too far. The original quilt has simple hand quilting. I am definitely going the machine quilting route and will likely vary the quilting design every few segments of the quilt.


I left the quilt top on the bed this morning when I left for work. I'm usually the last one home at the end of the day so we'll see what the family thinks about it now. I am happy to be making progress on this long desired quilt.

Linking up to Finish It Up Friday over at Crazy Mom Quilts.
Related Posts Plugin for WordPress, Blogger...